Overview
Rogers (formerly Shaw) Business Work From Home bundle includes Advantage WiFi, Advantage Security and Advantage Voice Mobile Remote. Use this guide for your step by step self-connect install.
In the box...
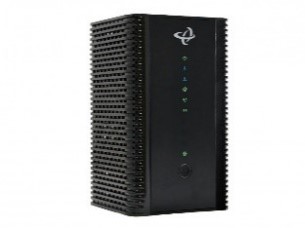 |  |  |
*Hitron Modem | Hitron Power Adapter | Coaxial Cable |
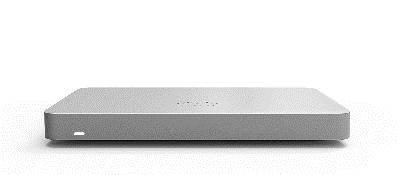 |  |  |
Meraki MX Security Appliance | Hitron Power Adapter | Coaxial Cable |
 |  | |
Meraki MX Security Appliance | Meraki MR Power Injector |
- May not be exactly as shown
How to install
Step 1: Choose the best location to place your modem and access point. Here are some tips for optimal placement.
- Choose a central location in your home
- Choose a spot unobstructed and elevated off of the ground
- Avoid placing the modem/access point in a cabinet or hiding behind another object
- Avoid placing the modem/access point in a basement or other underground location
- Place the modem/access point away from appliances, electrical equipment, and metal or stainless steel objects
- Rogers Business recommends the access point to be at least 20cm away from a person and if possible, 2.2m from the ground
Step 2: Connecting the equipment
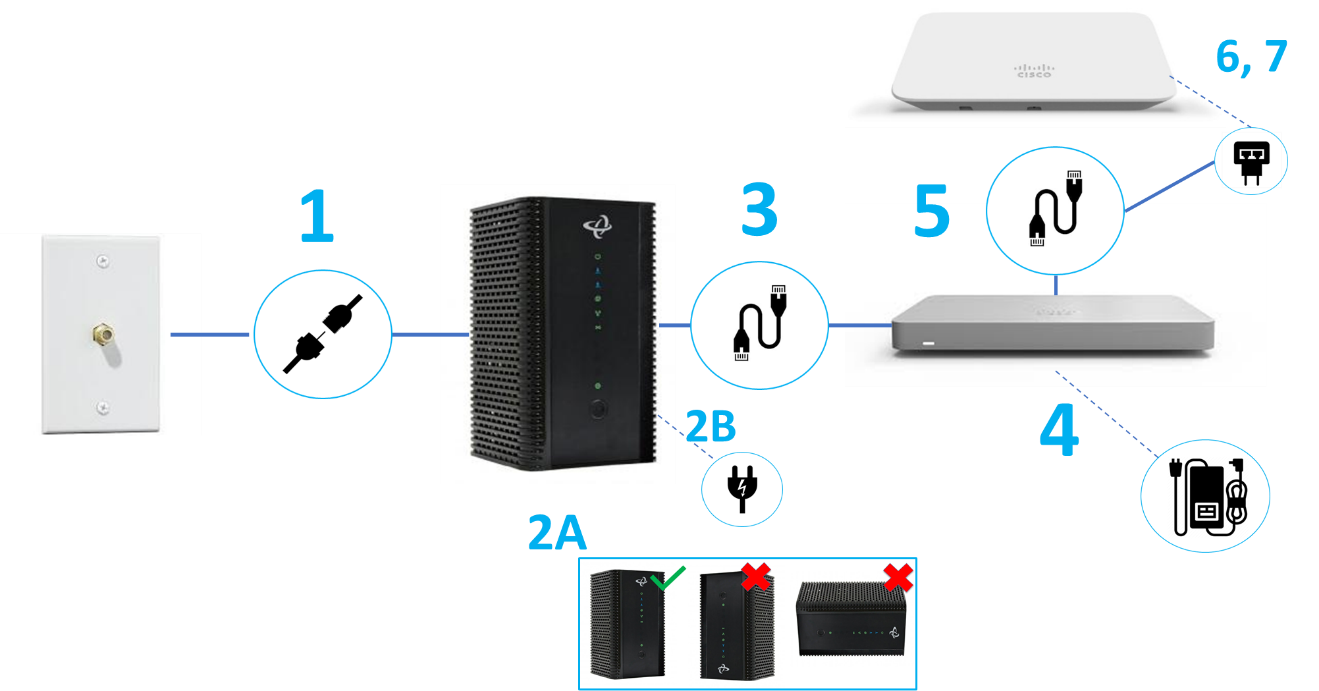
- Locate a coaxial wall outlet in your space, connect the cable from the wall to the Cable Connector port on your modem (Item #1 of the image above).
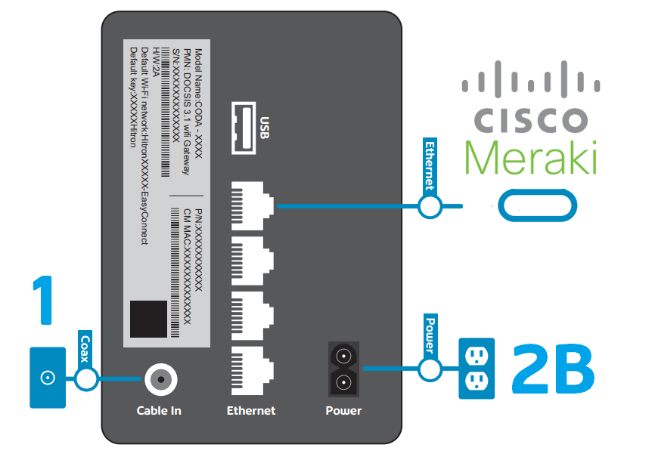
- Ensure that the Hitron modem is vertically mounted or placed on a level surface. The modem must stay upright with the logo on top.(Item #2A of the image above)
- When unpacking your new modem be sure to remove all the protective plastic film or the device may overheat
- Connect the power adapter to the modem and a wall outlet. (Item #2B) (The “@” symbol is the online indicator light)
- When your modem is ready, this will turn solid green
- Full details on installing your modem can be found on How to self-connect your Business modem
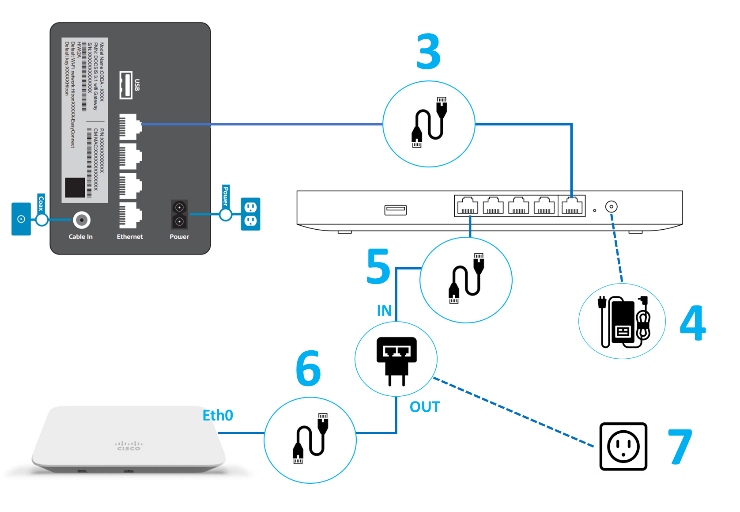
- Connect the CAT5 ethernet cable from Port 1 of the modem (the top port when the modem is upright) to the Internet port of the Meraki MX device.(Item #3)
- Connect the power adapter to the Meraki MX appliance and a wall outlet. (Item # 4)
- Connect another CAT5 ethernet cable from Port 1 of the MX device to the “IN” port on the MR power injector.(Item #5)
- The MR access point two Ethernet ports labeled Eth0 and POE(Item # 6)
- Plug the power cord into the MX power injector and the other end into wall power.(Item #7)
Step 3: For Advantage Voice
Need help troubleshooting or having network issues?
Please contact 1-866-244-7475