Your self-connect kit provides you with everything you need to setup your new CODA 4582 or 5810 modem - no appointments, no setup fees, no hassles. Whether you are upgrading from a previous model, or a new Internet customer, watch the videos below and read the instructions to learn how to setup your new modem. There is also some additional information below to help you with setup, upgrades and e-cycling resources.
Getting Started
Unpacking your new modem:

Inside the box you should find:
- Your modem, a power cord, a coax cable, an Ethernet cable and self-install instructions.
When unpacking your new modem be sure to remove all the protective plastic film or the device may overheat.
Finding the right place to install your new modem:
If you are upgrading from an older model of Rogers modem, you can connect the new modem in the same location.
If you are a new customer connecting a Rogers Modem for the first time, you will need to locate a coax outlet. These can typically be found in or near:
- Electrical Rooms
- Closets
- Existing networking or service equipment
Avoid placing your modem in basements, in cabinets, or behind other objects. To avoid WiFi interference, try to keep your modem away from household appliances, metal or stainless steel objects, and electrical equipment.
Connecting your new modem
Step 1: Mount modem vertically
The new modem must be vertically mounted or placed on a level surface as shown in the image below.
- The RF is at the top and if it is blocked then the wireless is blocked.
- If the fans on all sides are covered, it can cause the modem to overheat.

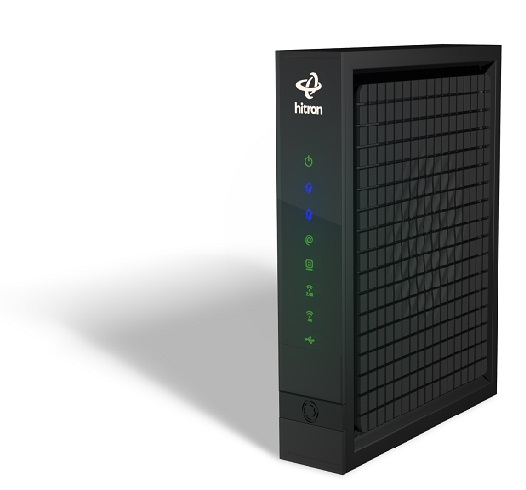
Hitron CODA-4852


Hitron CODA-5810
Note: If there is not an adequate way to orient the modem, when you call to activate your modem, let us know and we will ship a wall mount bracket to you at no charge.
Step 2: Connect coax cable
- Connect a coax cable from the outlet to the back of the new modem.
- Connect the other end of the coax cable to the outlet on the wall.
Step 3: Connect power cable
Using the included power cord, plug one end into the modem and the other into a working power outlet. Give the modem a few minutes to fully download any firmware.
Step 4: Modem Activation The modem is plug-and-play and will automatically activate. Watch for the LED (Online Indicator Light) to light up:
- Hitron CODA-5810: Solid white
- Hitron CODA-4582: Solid green @ symbol
The solid light is an indicator that the modem is activated.
Note: The Modem will likely restart at least once, please allow at least 10 minutes before checking that the online indicator light is solid. Do not unplug the modem during this period. *Verify that
You’re done! You don’t need to call us to finalize activation, now you’re ready to Set up your Internet following the steps below.
If you need any support or having any issues, please contact Rogers Business Technical Support at technicalsupport@shawbusiness.ca or call 1-877-742-9249.
How to: Set up your Internet
Now that the modem is installed and online you are ready to connect to the internet.
Connecting to WiFi:
- Hitron CODA-4582 & 5810: The modem will not be able to access the Internet without completing Easy Connect for the first time upon bootup or factory default resets.
- If you have a device wired directly to the modem you can complete Easy Connect without connecting to WiFi first.


Step 1: Connect to the Internet and choose a network name and password with Easy Connect
- Using a Smartphone, Tablet, or Computer; check the settings or connection menu to ensure WiFi is turned on.
- In the list of available networks, choose the Easy Connect WiFi Network that includes the last digits of the serial number labelled on the back of the modem.
- After selecting the network, you will be prompted to enter your default key which is located on the back of the modem.
- The modem will go through the steps required to check your network settings.
Step 2: Follow the on-screen Easy Connect instructions
- Once you are connected, open a web browser and follow the on-screen Easy Connect instructions to test your connection and customize your WiFi settings
- Select Let’s Go and you will be ready to set up your new WiFi network name and password.
- The network name entered here is what people will see when they want to discover and connect to your network.
- Your password must be a minimum of 8 characters long, you should choose a password that no one will easily guess.
- Note that the password you enter for the WiFi here will also be the password for the modem portal where you would log in to perform advanced configuration
- If your WiFi password is going to be shared, Rogers recommends updating the admin password after EasyConnect Setup is complete to ensure stronger security for your network.” More details on Hitron Router Settings: Administrative Password.
- After re-entering the password and selecting Confirm Setup you will have an opportunity to double check your settings before selecting Complete my Setup.
Step 3: Change your cusadmin password to your modem serial number
Now that the Easy Connect is completed, we will now want to connect to the user interface (192.168.0.1) to change the password to the modem serial number due to security reasons. The password is currently the same as the SSID password. Full details on How to change the Administrative Password.
If you have any questions or require additional support, please call Rogers Business Technical Support at 1-877-742-9249.
Connecting via Ethernet (bridged)
If your modem is bridged (WiFi disabled) your new modem won't act like a router, so that you can use your own networking equipment, just as you did with your old modem.
Helpful tips
- Ethernet connections: Anything plugged into the Ethernet will connect directly to the Internet. Unless you subscribe to multiple IPs, only one device should be plugged in to the modem.
- Static IP users: If your device is already configured to use a static IP, this modem swap won’t change anything. It’s a good idea to verify you’re still using the static IP address that was emailed to you when you requested your static IP. If you’ve misplaced your static IP configuration information email, contact Rogers Businsess Technical Support to request a new copy.
Connection Ports & Light Sequence
Hitron CODA-4582

| LED | LED Activity | Modem State |
|---|---|---|
| DS | Green Blinking | Searching for downstream frequency |
| Green Steady | Locked onto a downstream frequency | |
| Blue Steady | Channel bonded to downstream frequency | |
| Off | No downstream activity | |
| US | Green Blinking | Searching for upstream frequency |
| Green Steady | Locked onto a upstream frequency | |
| Blue Steady | Channel bonded to upstream frequency | |
| Off | No upstream activity | |
| Online | Green Blinking | Registering with service providers CMTS |
| Green Steady | Registered with service providers CMTS and is ready for data transfer | |
| Off | Modem is offline | |
| Wireless (2.4GHZ) | Off | 2.4GHZ wireless network is not enabled |
| Green Steady | 2.4GHZ wireless network is enabled and not data is being transmitted or received | |
| Green Blinking | 2.4GHZ wireless network is enabled and data is being transmitted or received | |
| Wireless (5GHZ) | Off | 5GHZ wireless network is not enabled |
| Green Steady | 5GHZ wireless network is enabled and not data is being transmitted or received | |
| Green Blinking | 5GHZ wireless network is enabled and data is being transmitted or received |
Hitron CODA-5810

| LED | LED Activity | Modem State |
|---|---|---|
| GREEN | Easing/Breathing | Booting |
| WHITE GREEN | Alternating | Establishing DOCSIS |
| WHITE | Easing/Breathing | Config file download |
| WHITE | Steady | Online & all enabled radios active |
| RED GREEN BLUE | Steady | Bridge-mode or WiFi disabled but fully online |
| RED GREEN BLUE WHITE | Alternating | Software upgrade/downgrade in progress |
| BLUE | Blinking | WPS Sync |
| BLUE | Solid (5 sec) | WPS paired |
| RED | Blinking | DOCSIS issue (Range issues or no signal) |
| RED | Slow Blinking | Provisioning issue (Not authorized or failed to download config file) |
| RED | Steady | Faulty hardware or software |
How to self-connect your modem - Video & User Guides
How to self-connect the Hitron Coda-4582
Hitron CODA-5810 User Guide
*Note: This video & user guide reference upgrading from a prior model to the Coda-4582, but many of the steps are identical if you are setting up your first Rogers Modem. These steps will also work for the Coda-5810. As of February 1, 2023, you will no longer need to contact Rogers Business Technical Support as outlined in step 7.
What should I do with my old modem?
Based on the model of your modem, you will need to recycle it or return it.
- Please return the following modems:
- CGNM-2250 (shown on the right)
- CODA-4582 (shown above)
- Mail-in your old Hitron modem using the Canada Post return postage label, provided in your self-install kit or follow the instructions on How to return your Rogers Business equipment.
If your modem does not look like the ones shown on this page, you can recycle it. Visit the below sites to learn how to recycle electronics in your area.
- Alberta: albertarecycling.ca.
- All other provinces: recyclemyelectronics.ca.