Discover how virtual networks can support network users in multiple physical locations. Learn how to configure VLANS on your Advantage Security (formerly SmartSecurity) Appliance.
How to enable VLAN in the Meraki Dashboard
A virtual LAN (VLAN) can be used to segment traffic across your network by configuring a broadcast domain that is partitioned and isolated in a computer network at the data link layer (OSI layer 2).
The network administrator of your Advantage Security can enable and configure a VLAN for your network through the Meraki Dashboard. Details on Getting started with the Meraki Dashboard.
- To enable, go to Configure -> Addressing & VLANs -> Routing.
- Change VLANs option to 'Enabled'.

VLANs can be added by clicking Add a Local VLAN.


The MX IP is the local IP address of the MX when VLANs are disabled, and in many cases, it can serve as the default gateway for local devices.


Configuring the VLAN
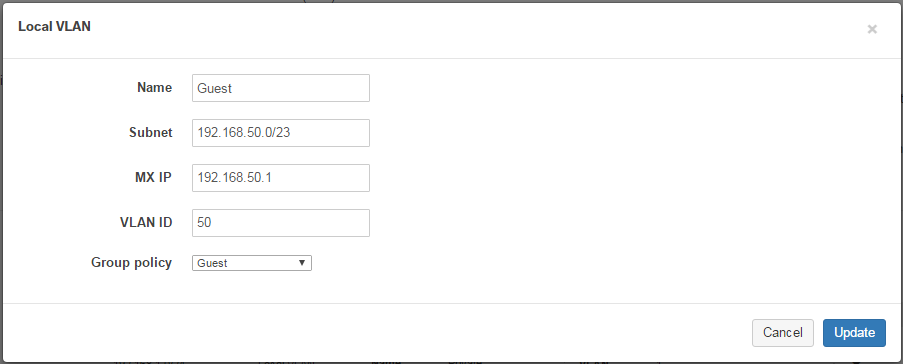
After VLANs have been enabled, VLANs can be added by clicking 'Add a Local VLAN', or re-configured by clicking on an existing VLAN from the list.
- Name: description of the VLAN.
Subnet: the network expressed using CIDR notation. Dictates IP range and capacity.
- LAN address: user defined
- Devices Capacity (/XX): recommended 29-22
- /29: 6 devices
- /28: 14 devices
- /27: 30 devices
- /26: 62 devices
- /25: 126 devices
- /24: 254 devices
- /23: 510 devices
- /22: 1022 devices
- MX IP: The MX's IP on the LAN. Usually .1 of the range.
- VLAN ID: VLAN number, and the Appliance LAN IP is the local MX VLAN interface IP.
- Group Policy: Create group to help set specific settings/rules to groups, and then add devices to the group.

Example
In this example, the MX has three VLANs:
Private: 192.168.1.0/24 Guest: 192.168.50.0/23 DMZ: 192.168.75.0/24
To remove a VLAN
A VLAN can be removed by selecting the X in the far right column.
Configuring the LAN Ports
The uplink ports to our switches will be configured as a trunk port to carry the VLANs that were configured in the previous step.
Changes can be made to the MX LAN ports under Per-port VLAN configuration by selecting the check box beside the port number or by selecting multiple ports and clicking the Edit button.
- Enabled: Leave enabled unless a specific LAN port should never be used.
- Type: determines if the LAN port is an access or trunk port.
- Trunk: When connecting LAN port to switch that will carry multiple VLANs.
- Access: When connecting to device or switch only for use with one VLAN.
- VLAN (Shows as Native VLAN if type is Trunk): Traffic without an 802.1Q tag will be dropped by default unless a native VLAN is defined from the VLAN field.
- Allowed VLANs: Specify specific VLANs that the trunk port will allow from Allowed VLANs or choose to allow all VLANs to pass on the link.

How to restrict Inter-VLAN traffic
The order of Layer 3 rules are important. Any special rules that need to be followed first must be at top of list.
- Go to Security appliance -> Firewall.
- Go to Layer 3 -> Outbound rules, and Add a rule.
- Deny Any traffic from the DMZ VLAN to the Private VLAN.
- Deny Any traffic from the DMZ VLAN to the Client VPN VLAN.
- Click Save to keep any changes. This will prevent any devices using the DMZ VLAN from accessing devices on the Private and Client VPN VLANs.